Article Updated: December 2025
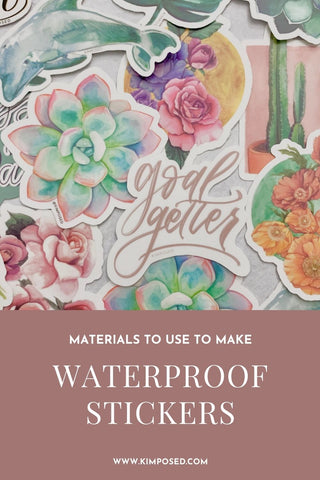
A couple of years ago, I wanted to expand my product line to include stickers! There were a few things that were really important to me at the time for me to add it to my store:
-
Quality: I wanted my stickers to last! I had come across some other homemade stickers in the past that didn’t stand up in water, peel up over time, or faded in the sun, and I knew that was not what I wanted for my line.
-
Cost: There are plenty of quality sticker production companies that I will turn to in terms of quality, but the price of production plus shipping didn’t give small businesses that are just testing a design a lot of profit margin to work with. However, if you value time more than you do cost, Keenslaps is an excellent option to consider.
- Variety: The ability to create lots of different sticker designs without having to invest in a ton of inventory was also something I considered. As a creator, I dive into every product hoping that every design will be an instant hit, but the hard reality that only a few designs will regularly sell. Making your own stickers will help keep your inventory levels low in case a design doesn't turn over as quickly as you would've hoped.
The Products I Use to Make Stickers
So — what option did I have left? After weeks of research, I decided to invest in a Cricut Explore Machine and make the stickers myself!
The initial investment was high, but I knew that the ability to create products as they are ordered will help me eliminate waste, keep my on-hand inventory lean, and maintain the margins I needed to be successful.
Cutting Machine for those Die-Cuts
Cricut has added some new machines since then, like the Cricut Maker. For a more cost effective option, you can also opt for the Cricut Joy Xtra.
Transparently, I have run into some issues with my Cricut that would make me consider recommending their biggest competitor, the Silhouette Cameo (I've never used the Silhouette, but their machine seems to have addressed these problems):
Cricut machines can't seem to cut on glossy surfaces. The scanning tool has a hard time identifying the enclosing box when cutting a glossy surface, so you'll run into countless errors. One way to hack this is to place non-gloss, matte Scotch tape (like the one you use for wrapping gifts) on top of the bold black registration outline prior to cutting.
From time to time your Cricut machine will need to be re-calibrated for alignment. If you don't have a thick border between your artwork and the cutline, it's likely that the cut alignment will get wonky over time. Recalibration doesn't take long, but you might waste a sticker sheet if you start a project without realizing the alignment is off. Once recalibrated, you can continue working as normal without issue!

Sticker + Laminate Paper
For permanent stickers: If you're like me and decorate your water bottles or luggage with stickers, you want to make sure that it stays on FOR GOOD. No one likes dealing with peeling stickers. For a permanent sticker paper, I use waterproof matte vinyl sticker paper for inkjet printers.
For removable stickers: I recently came across Koala's brand of matte vinyl sticker paper and loved how vibrant my test prints turned out! I recommend tryin this option if you're looking for a cost-effective pack of printable sticker paper. They are a REMOVABLE sticker option for easy repositioning, so if you're looking for a more permanent solution, this might not be the right pick for you.
Quick tip: I also add an additional non-gloss over-laminate sheet on top of my printed stickers to provide additional protection, rigidity, and another layer of waterproofing for the sticker artwork.
I place the laminate overlay after the stickers are printed on the vinyl sticker paper, before I cut them out with my Cricut. This laminate sheet works perfectly with Cricut and any other cutting machines.
Since this creates a thicker layer to cut through when making die-cut stickers, it's recommended that you set your Cricut cut settings to Cardstock or thicker when cutting, to ensure a clean cut.
If you're looking to make holographic stickers, this overlay option (instead of the laminate overlay) has been a lot of fun to work with.
Edit: I was able to find a PRINTABLE holographic vinyl sticker paper that has been highly rated! Just print directly onto the holographic sheet, rather than adding an overlay. It works with both inkjet and laser printers, and are waterproof as well.

Printer & Scanner
I currently use a Canon PIXMA Pro-100 to make all of my prints, which I also use to print all of my stickers! It's out of production now, but Canon has released the next iteration: the Canon PIXMA Pro-200S. Make sure to select the "glossy" material type setting to achieve the best quality print.
I like that the Canon PIXMA series has the ability to print in wide format (up to 13" x 19"), with borderless printing, so that I can use it for my art prints as well.
 Finally, to scan my paintings, I use Epson's Perfection V39 document scanner
. I personally looked for a scanner that was portable, had a relatively large scanning bed, and could scan at high optical resolutions (This scanner can scan up to 4800 DPI. I usually recommend at least 600 DPI).


*Note: I do get a portion on all purchases made through the Amazon links in this article, which help fund my art supplies and small business. Please do not feel obligated to purchase any of the products I recommend.
Loved the blog? Pin it for later!


 https://kimposed.com


14 comments
Thanks for sharing. This information was very helpful.
I love my silhouette. I also would like to know what mil your laminate is. 1 use 2 mil but it seems stiff to me. I bought 1.5 mil roll but is was impossible to work with
Re: Laura – “So, do you put the laminate layer over top of the stickers before or after you cut them with your Cricut?”
I do put the laminate layer over top of stickers before I cut using the Cricut. This way it will cut both the sticker and the laminate overlay into the shape you want.
So, do you put the laminate layer over top of the stickers before or after you cut them with your Cricut?
Thanks!
Great Blog!!